Building the Raspberry Pi NOAA Satellite Station
Building the Raspberry Pi NOAA Satellite Station
After building the station
to receive the GOES geostationary weather satellite, constructing the NOAA
satellite station was a relative breeze. The NOAA series of satellites (NOAA
15, 18 and 19) are much more similar to amateur satellites than the GOES satellite
– they operate in the 137 mhz band, are in low-earth orbits and transmit analog
images rather than the complex error-corrected digital images of the GOES
satellites. I simply followed the “Instructables”
project design and it mostly worked the first time.
The overall concept is simple – the project uses a
inexpensive RTL-SDR
radio and a Raspberry
Pi computer along with free software that you install on the Pi. There are
several components to the software – first it uses the Gpredict program to set
up times (cron jobs) for each satellite based on the next pass for each of the
three satellites. At the scheduled time the Pi runs a script that will enable
the RTL-SDR receiver, set it to the frequency for the respective satellite, and
will pipe the output to the wxtoimg program that will record the output in a
format to be processed. At the end of the pass the wxtoimg program will process
the output into images based on the parameters given to that program. It will
then schedule the next pass for that satellite and go dormant again until the
next satellite pass.
Change to instructions
The instructions from the Instructables site were quite accurate
and helpful, with one exception – they reference the original website for the
wxtoimg software. But apparently the author of that software has disappeared,
it’s no longer being supported and the original wxtoimg.com website no longer
exists. That meant that anyone wanting to use this program (which is
outstanding and apparently used by everyone decoding this data) had no place
from which to download it. Fortunately a
guy named Kevin Schuchmann created a site called WxToImg Restored with all of the code
for downloading as well as the keys to unlock the premium versions of the
programs. Therefore, when the Instructables instructions say to get the wxtoimg
file here:
wget http://www.wxtoimg.com/beta/wxtoimg-armhf-2.11.2-beta.deb
you need to instead use this site:
Otherwise everything worked fine for me.
Image output
The program places the RTL-SDR output file and the decoded
images in the /home/pi/weather folder, so that’s where you’ll find them for
viewing. Sooner or later we’ll need to do some cleanup on that folder, but the
images are pretty small so it’s not an immediate concern.
Although wxtoimg can produce multiple decoded images from
the downloaded data the Instructables project only used one of them. K2QA and I
played around with the Windows version of the program and its output and
figured out a couple of additional command line options that can be added to
produce additional images. They’re shown in the script in Figure
1
below, which is in the /home/pi/weather/predict folder. These produce the
images in Figure 2,
Figure 3
and Figure 4
below.
Adding pictures to the website
Viewing the images on the Pi is a little cumbersome so we
wrote a script to find the most recent of each picture file type and copy it into
a folder from which it could be viewed on a website (you’ll need to install
Apache on the Pi first). The script below will copy the most recent MCIR file
into a file named current_mcir.png in the html folder from which it can be displayed
on a web page.
#!/bin/bash
MCIR_FILE=$(ls -l /home/pi/weather | grep mcir | sed 's/^.*NOAA/NOAA/'
| sort -k 1.7 | tail -1)
cp /home/pi/weather/$MCIR_FILE /var/www/html/current_mcir.png
That can be displayed by an HTML script like the one below:
<DOCTYPE html>
<html>
<head>
<title>W2MMD NOAA
Pictures of the Day</title>
</head>
<body>
<h1>W2MMD NOAA
Pictures of the Day</h1>
<img
src="current_org.png" alt="POTD" height="800"
width="800">
<img
src="current_no.png" alt="POTD" height="800"
width="800">
<img
src="current_mcir.png" alt="POTD" height="800"
width="800">
</body>
</html>
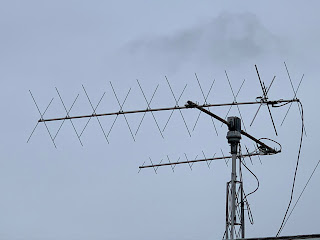
RF Hardware
Although the NOAA satellites use the 137 mhz frequencies
they appear to be pretty readable using 2 meter antennas, so we simply put a T
connector in the feedline for the Lindenblad antenna used for our Fox-In-A-Box
receiver and fed it to the RTL-SDR (the antenna has a mast-mounted broadband
preamp so we didn’t worry about connector loss). That gave us decent but not
exceptional pictures, but adding the SAW
filter in front of the RTL-SRD receiver caused a significant increase in picture
quality – almost all of the passes now generate very good images. Signals from
these satellites are significantly stronger than from ham satellites (perhaps
te US government has a higher satellite budget than AMSAT) so marginal antennas
may still work well.


Nice write ups for the NOAA and also the GOES satellite reception project.
ReplyDeleteFor your next step in the weather satellite reception series you should try and decode Meteor-M images.
https://www.rtl-sdr.com/decoding-meteor-m-images-raspberry-pi-rtl-sdr/
From what i can see if you have a working NOAA setup then some software changes should allow reception of the Meteor-M images.
Hi
ReplyDeleteLet me know the name and folder to place two scripts you talk about "adding pictures to the website". Thanks!